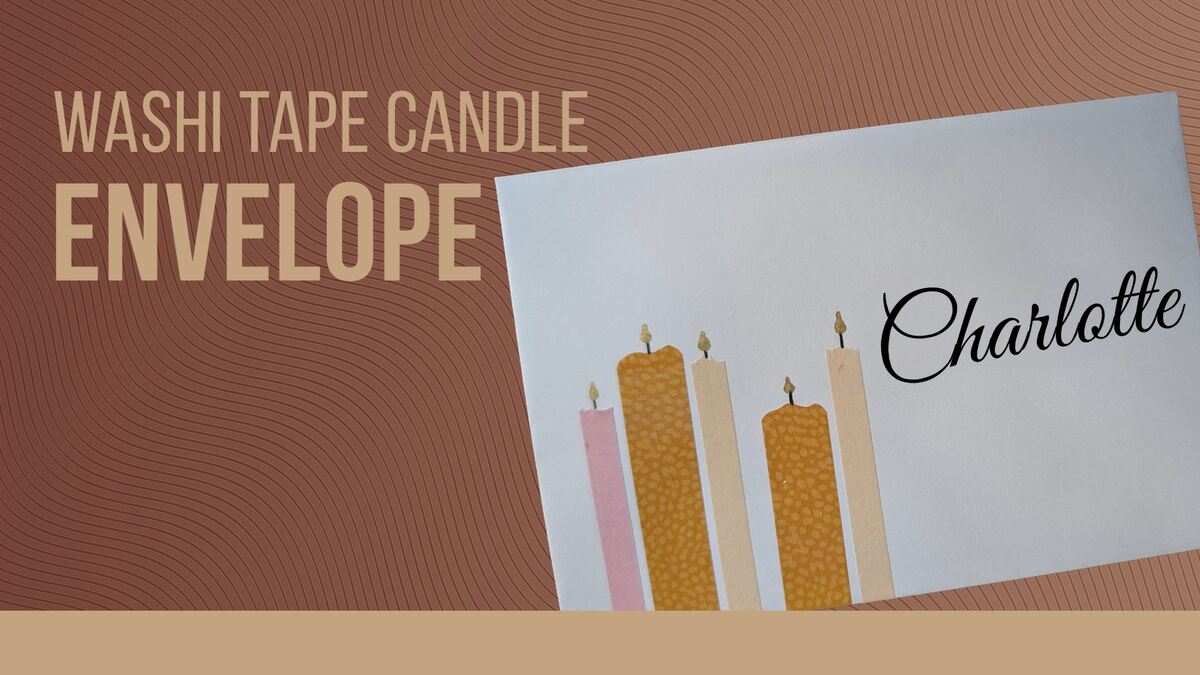
Hi friends! Today I’m sharing an envelope idea that I use very often for birthday cards. Washi tape candles are not only super cute, but quite quick to create. Another bonus is you only need a few tools to create this look. Let’s jump in!
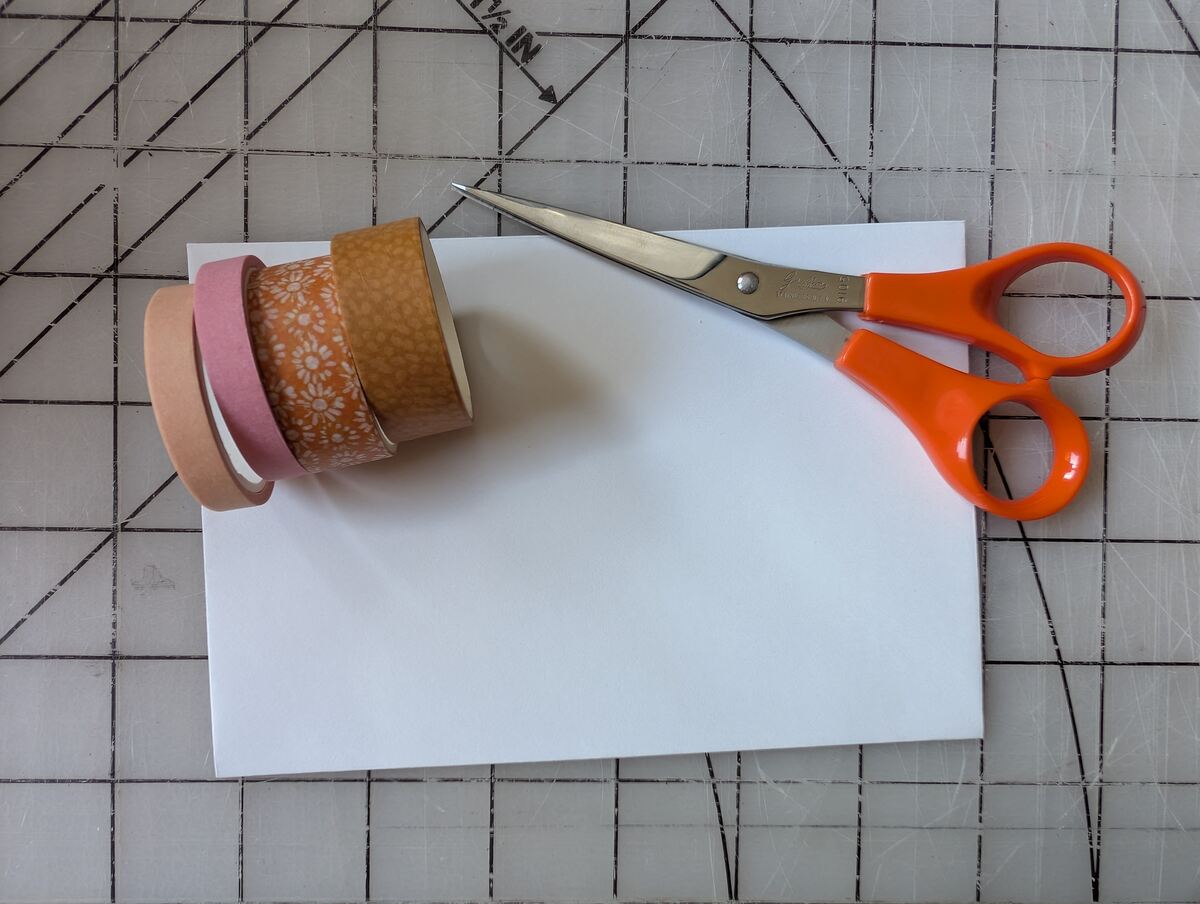
You’ll need:
- Washi tape: This one’s a bit obvious. I like to coordinate or match the tape I choose to the card that’s going in the envelope I’m decorating. This is a completely optional step. A simple search for washi tape on Amazon will lead you to lots of fun possibilities!
- Black pen: I personally like Pilot G-2 07 pens for this because I also like to write my card with them, but Sakura Micron Fineliners will work great for this too.
- Gold Gelly Roll or another yellowish pen: This is for the flame. I personally love the look of the gold Gelly Rolls because they are shiny even after they dry giving the flame a cool glow.
- Scissors: These are not required, but I like to have them handy for when I need to cut my washi tape and make it look nice.
- Envelope: This is the most important part! You can use any envelope for this project, but I prefer to use white ones because I like my candles to pop a little more.
How To:
Begin by choosing your washi tape. As I mentioned above, I sometimes like to coordinate the tape I choose for the candles to the card that’s going in the envelope I’m decorating. Totally optional step here.
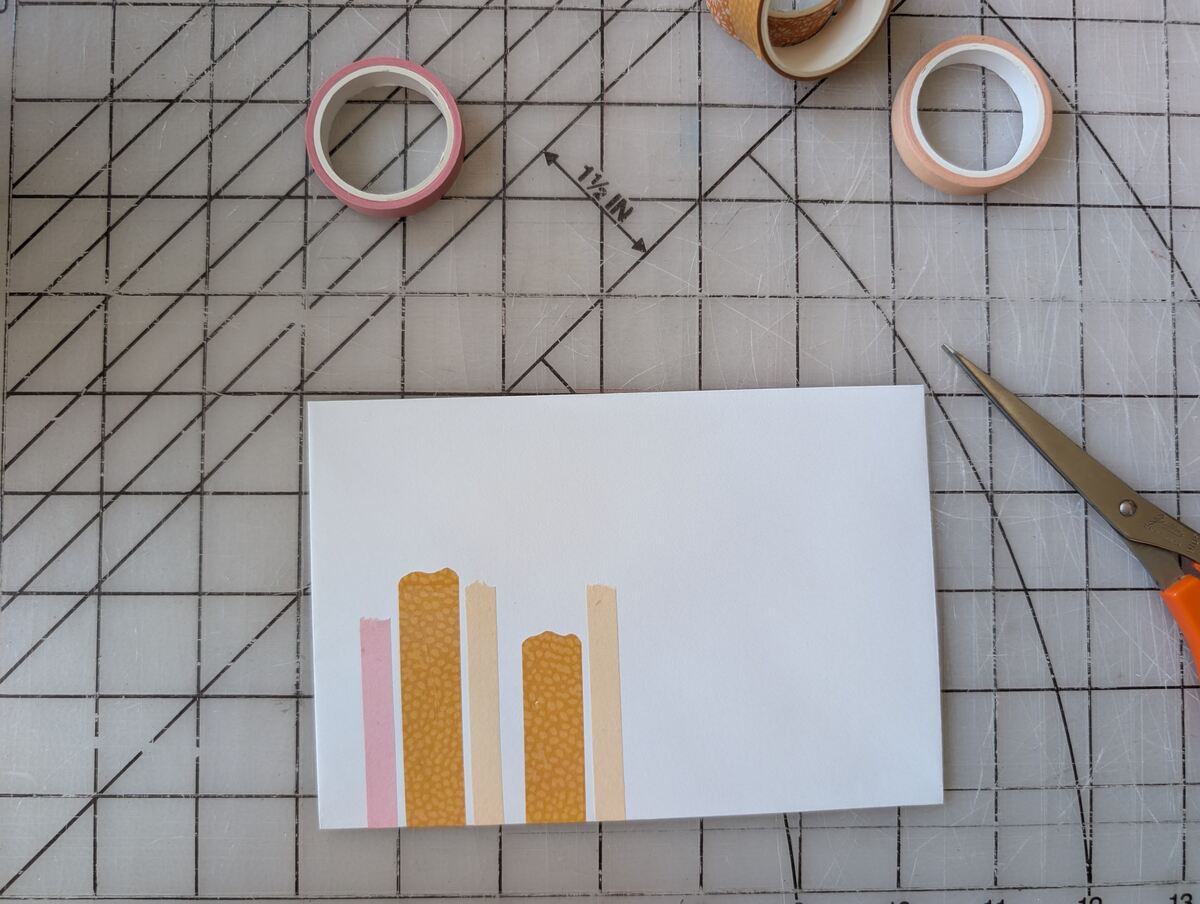
I like to choose a mix of different widths and patterns for my tape. This gives some variety and visual interest.
To start applying the tape to the envelope, take the end and either tear off a bit or cut a wavy line along the edge. This is so your candle looks like it’s melting. If you want the top of your candle to be straight, go for it.
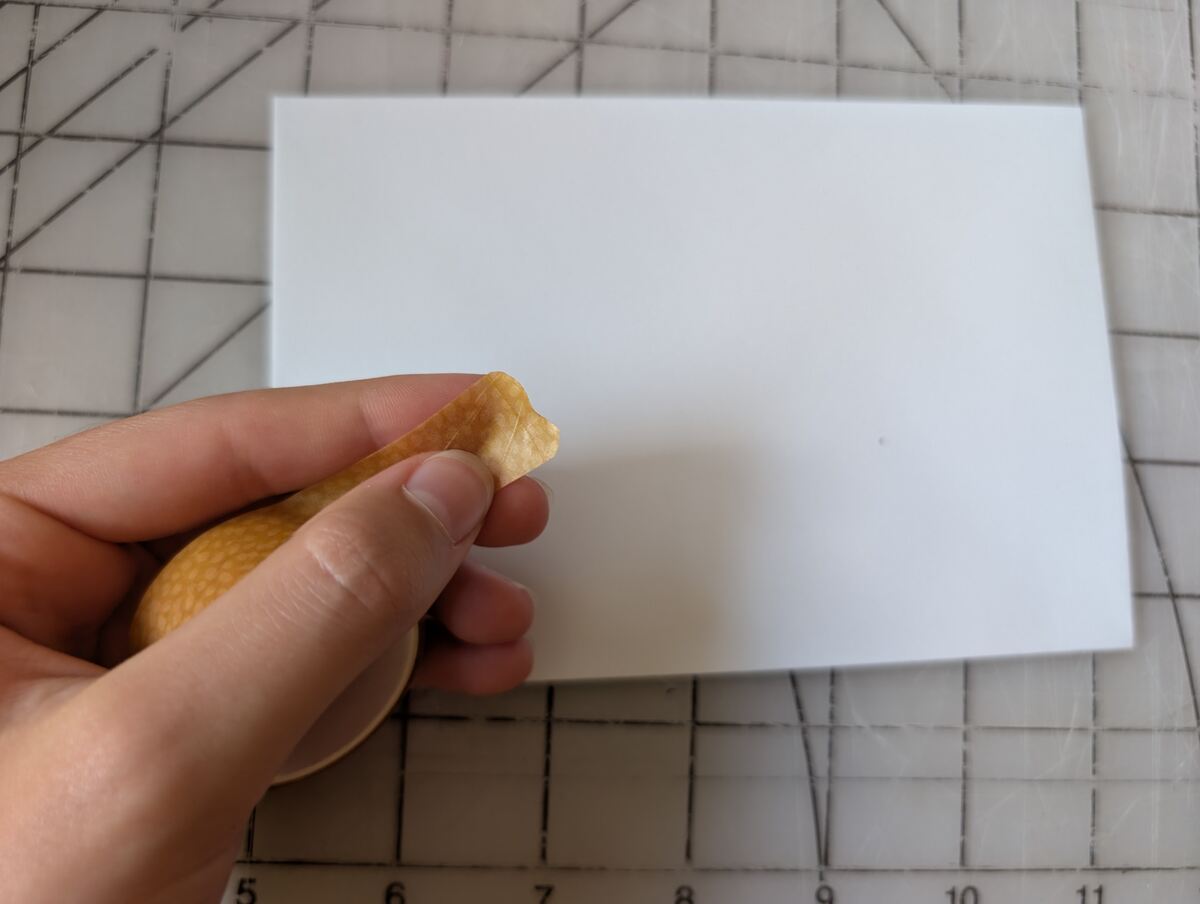
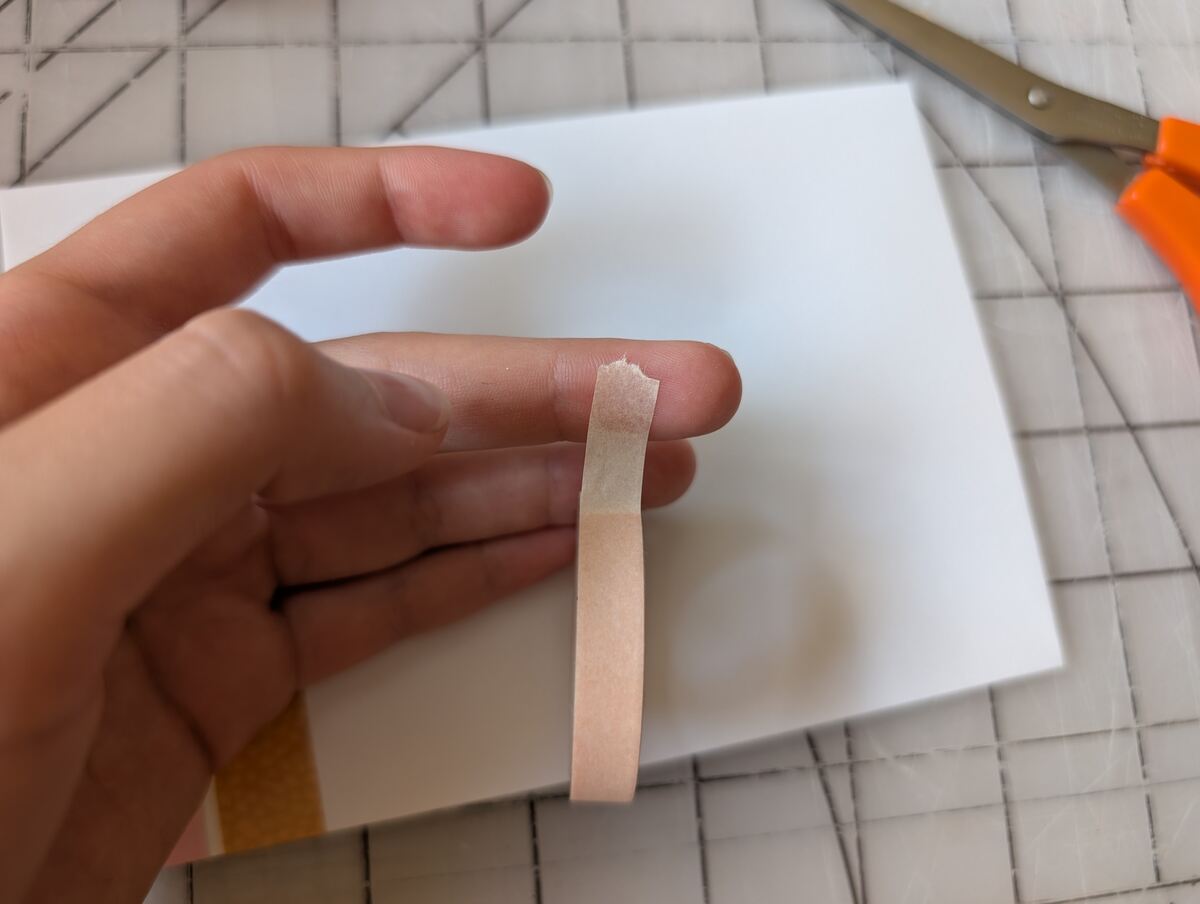
Next, position the tape on the envelope so it’s straight. It likely won’t be perfectly straight, but that’s ok, just make it as straight as you can get it. The tape should still be attached to the roll here. Once you’re happy with how it looks, flip the whole envelope over and carefully cut along the edge with your scissors. The goal here is to not cut your envelope but to get your washi tape as close to being flush with the edge as possible.

Repeat the above steps for as many candles as you’d like to have. I like to make mine different heights and distances apart. I generally prefer to have an odd number of candles.
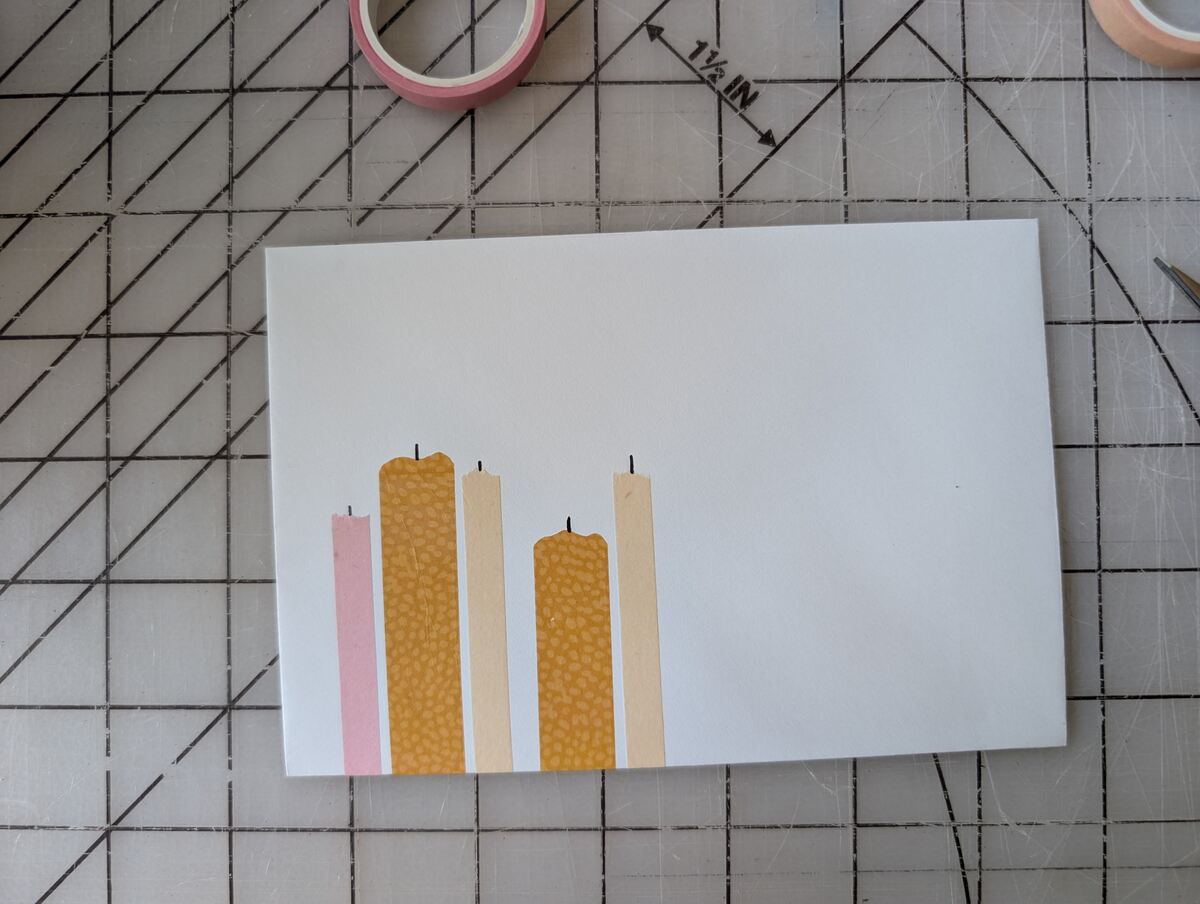
Now it’s time to draw the wicks! Take your black pen of choice and draw a small line going straight up from somewhere in the middle of the top of each candle. These can be different lengths too!
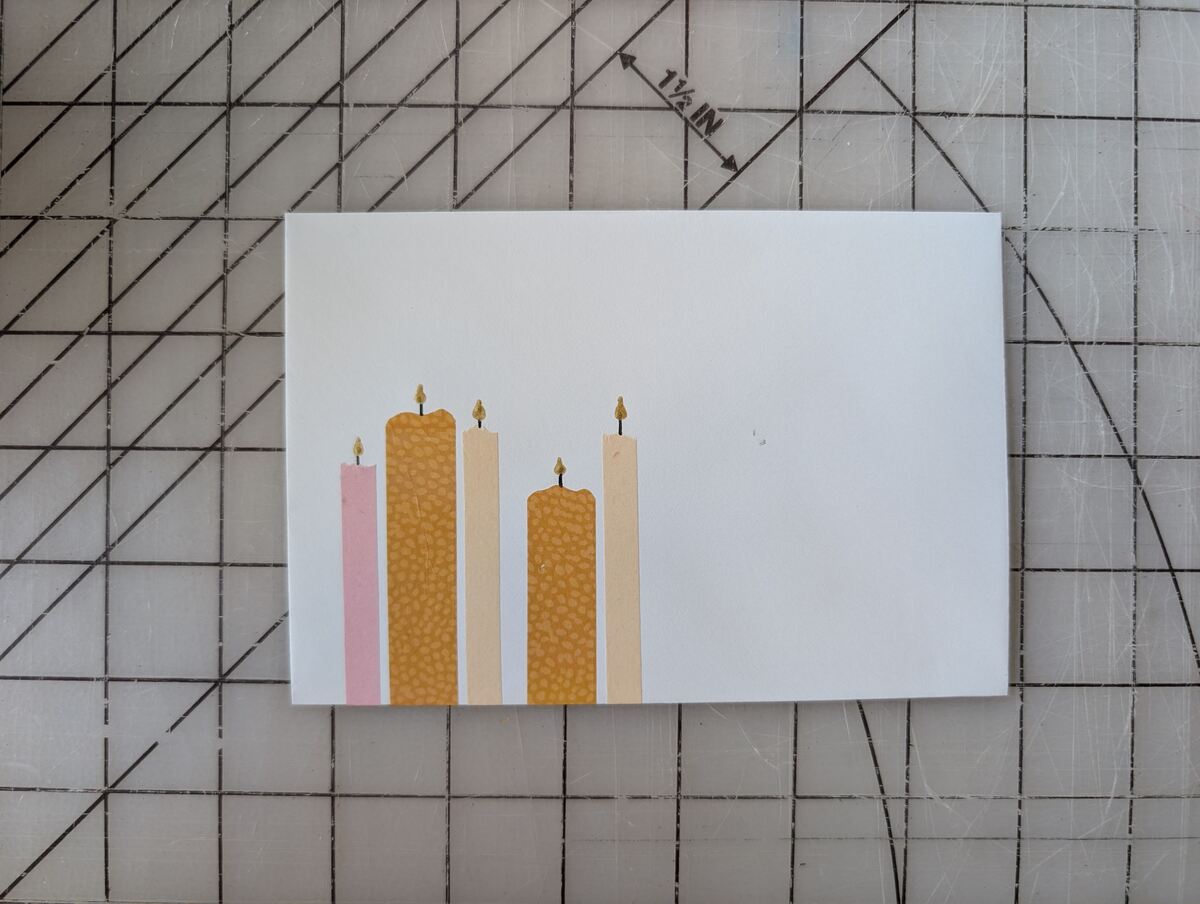
For the candle flames, take your gold or yellow pen and draw a tear drop shape on top of your black line/wick.
Another thing I like to do is write the recipient’s name in calligraphy (generally faux calligraphy actually) somewhere on the front of the envelope. It adds a nice little touch.
See?! I told you it was quick!
Now go make a fancy birthday envelope to brighten someone's day!
Happy crafting!